If you are building a Zapier lead generation workflow for local business leads, the data step is the hard part: finding businesses, their websites, phone numbers, and contact emails without maintaining a scraper. biz collect gives Zapier a clean path with Webhooks by Zapier. One action POSTs a location and keywords to /v1/search, you get an async job_id, then a short delay-and-poll pattern checks /v1/jobs/:id until the structured JSON is ready. This guide builds a working Zap that finds local businesses, extracts deduped emails from their websites, and sends the results to Google Sheets or HubSpot. It is also honest about where Zapier's polling model differs from n8n and Make, because that difference shapes how you build the Zap.
Why Use an API for Lead Generation in Zapier?
Zapier is the most widely used no-code automation platform, with thousands of app integrations, a clean trigger-and-action model, and built-in tools like Webhooks, Delay, Formatter, Filter, and Paths. It is excellent at moving data between apps. But local lead generation has a data-acquisition step that Zapier alone is not built to handle, because Zapier has no browser automation and no native loop.
A scraping-first approach in Zapier means calling an external scraping service, parsing brittle HTML, and running a second scraper to find emails on each website. That is fragile and expensive to maintain. The cleaner approach is to call an API that already returns structured business data with emails, so the Zap only has to route the results. If you are still comparing sources, this guide on which wins for local data: the Places API, a scraper, or a business data API walks through the options.
biz collect is designed for exactly that. It is an LLM-native business contacts API built for agents, workflow tools, scripts, and CRM enrichment. You call /api/v1/search with parameters such as location, keywords, radius_km, and scrape_emails. The API returns a queued job. You poll /api/v1/jobs/:id until it completes, then use the returned JSON records in the rest of the Zap.
That lets your Zap focus on routing:
- Start a search from a form, a schedule, or a webhook.
- Request structured local business data from biz collect.
- Wait for the async job, then poll for the result.
- Split returned businesses into rows or records.
- Filter and clean records.
- Send qualified leads to Google Sheets, HubSpot, Airtable, or another app.
For API details, start with the API docs, integration examples at integrations, and plan limits on pricing. To see the async search-and-poll lifecycle before you build, the how biz collect works page walks through it. Zapier's own documentation is useful for the tools used here, especially Webhooks by Zapier, Delay by Zapier, and Formatter by Zapier.
Be Honest About Zapier's Polling Constraints
Before building, it is worth understanding how Zapier differs from n8n and Make, because it changes the design.
- A single Zap run is linear. There is no native "loop until a condition is true" the way n8n's Wait-and-loop or Make's Repeater work. Each Zap run flows top to bottom, once.
- Delay by Zapier waits, but it does not loop. You can insert a delay between a request and a poll, but a single run gives you a single poll. To poll several times, you either re-trigger the Zap or use Sub-Zaps and looping helpers, which adds complexity.
- Task limits matter. Every action step that runs counts as a task against your plan, so a multi-step polling pattern consumes tasks quickly at volume.
- Code by Zapier is the escape hatch. A JavaScript or Python step can fetch, wait, and re-poll inside one step, which sidesteps the no-loop limitation for moderate jobs.
The practical consequence: the cleanest Zapier design either (a) uses a generous single delay sized to how long jobs usually take, then polls once, or (b) uses a Code by Zapier step that polls in a short internal loop. n8n and Make handle multi-attempt polling more naturally; the post on the n8n lead generation workflow shows that native loop if you want to compare. Within Zapier, you design around the linear model rather than against it.
What This Zap Builds
The Zap in this tutorial automates local leads from search request to destination output, using standard Zapier steps with biz collect handling the business search.
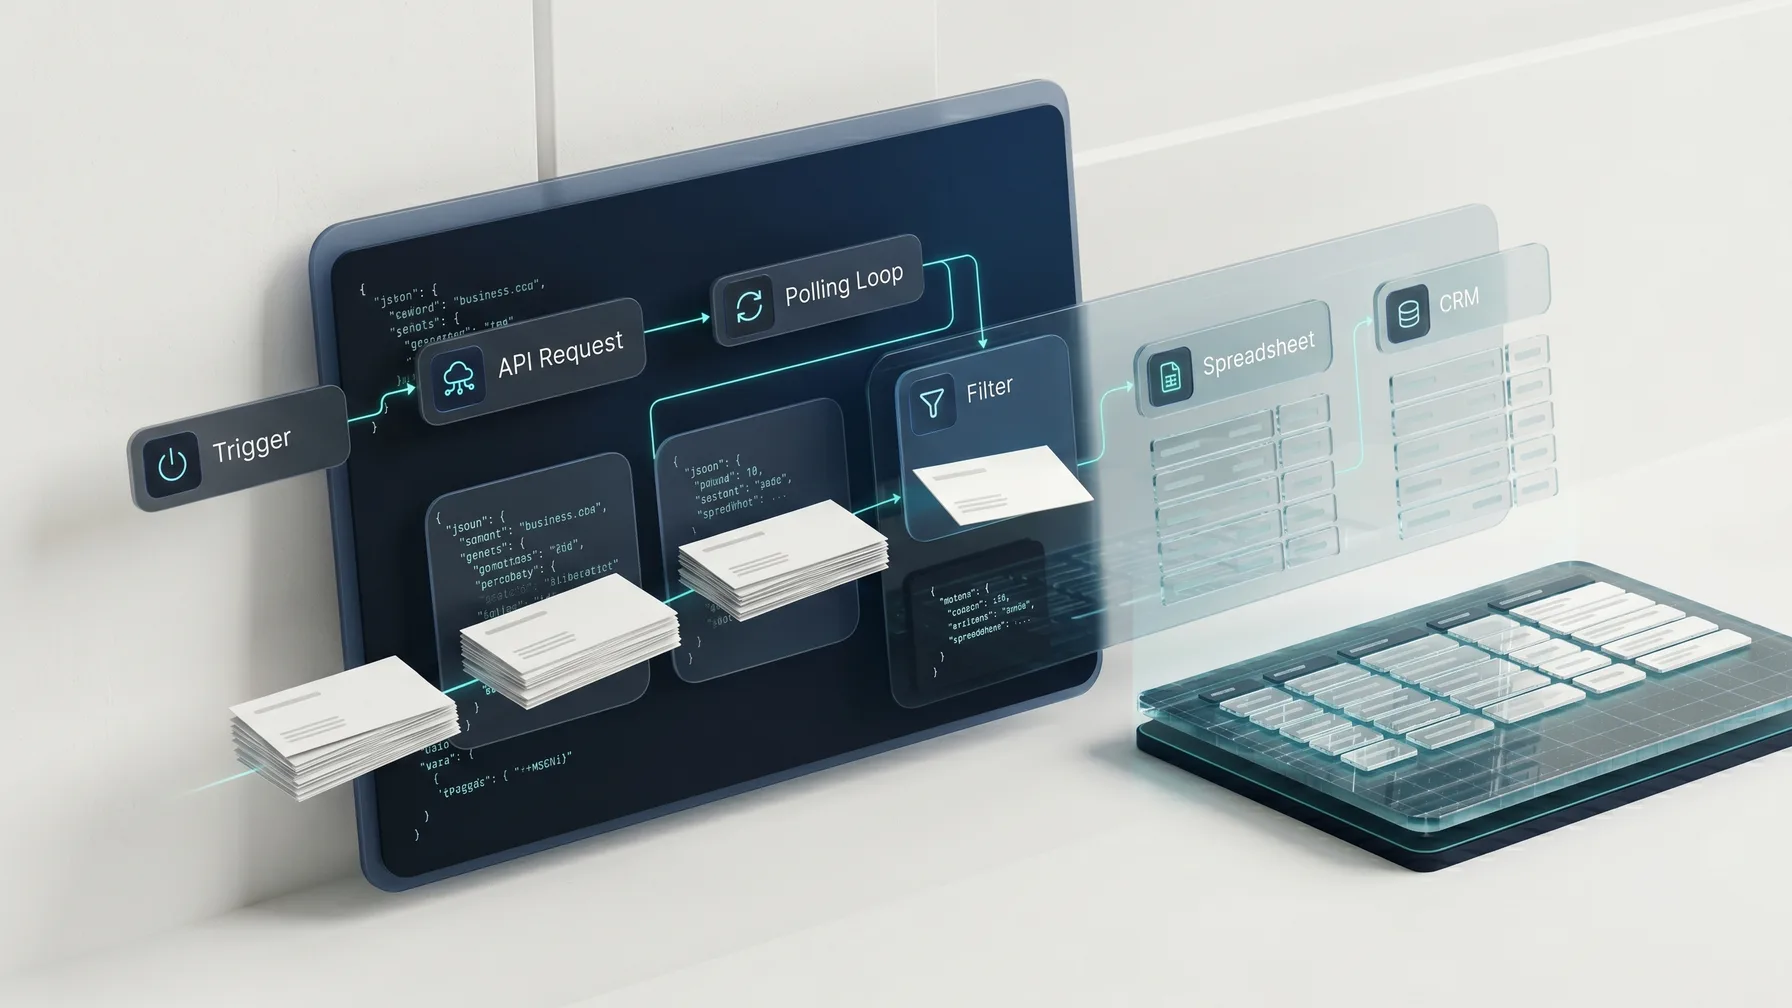
The final Zap looks like this:
- A trigger starts the Zap from a form, schedule, or webhook.
- A Webhooks by Zapier action sends a
POSTto biz collect/api/v1/search. - The response returns a
job_idand status. - A Delay by Zapier step waits long enough for the job to finish.
- A second Webhooks by Zapier action calls
/api/v1/jobs/:id. - A Filter checks that the status is
completed. - A Formatter or Code step splits and cleans the businesses.
- A destination action sends leads to Google Sheets, HubSpot, or another app.
You can adapt the same pattern for one-off prospecting, recurring scans, agency lead lists, or CRM enrichment, including AI-agent workflows that need verified local business contact data.
Prerequisites
Before building, you need:
- A Zapier account on a plan that includes multi-step Zaps (required for Webhooks, Delay, and Formatter).
- A biz collect API key.
- A destination such as Google Sheets or HubSpot.
- A clear search definition: location, business category keywords, radius, and whether to extract emails from websites.
biz collect is free to start with 200 signup credits and no credit card. That is enough to build and test the Zap before committing it to a schedule. Check pricing for current limits.
Data Flow and API Shape
biz collect uses an async job flow because local business search and website email extraction take longer than a normal synchronous request.
The basic request is a POST to:
https://bizcollect.dev/api/v1/search
The body includes the search inputs:
{
  "location": "Denver, CO",
  "keywords": ["roofing contractor", "roofer"],
  "radius_km": 25,
  "scrape_emails": true
}
The response contains the job identifier. The Zap only needs the job_id and status:
{
  "job_id": "job_123456",
  "status": "queued",
  "poll_url": "/api/v1/jobs/job_123456"
}
Then Zapier polls:
GET https://bizcollect.dev/api/v1/jobs/job_123456
When completed, the result contains structured records:
{
  "job_id": "job_123456",
  "status": "completed",
  "businesses": [
    {
      "name": "Example Roofing Co",
      "address": "500 Market St, Denver, CO 80202",
      "phone": "+1 303-555-0101",
      "website": "https://exampleroofing.com",
      "emails": ["office@exampleroofing.com", "info@exampleroofing.com"]
    }
  ]
}
The contract is stable: start a search, receive a job_id, poll the job endpoint, then process structured JSON. For the authoritative schema, use the OpenAPI reference in the biz collect docs.
Step 1: Choose the Trigger
Pick the trigger that matches your use case:
- Schedule by Zapier for recurring prospecting, such as every Monday morning.
- Google Forms, Typeform, or Webhook when a person or another system submits a search.
- Manual test trigger while building.
For a first version, use a Schedule trigger or a form, and pass the location, keywords, and radius into the search step. If you want another tool to start searches, use a Catch Hook (Webhooks by Zapier) trigger and send:
{
  "location": "Vienna, Austria",
  "keywords": ["dental clinic", "dentist"],
  "radius_km": 10,
  "scrape_emails": true
}
Keep the first Zap simple, confirm the response shape, then map dynamic fields.
Step 2: POST to /api/v1/search With Webhooks by Zapier
Add a Webhooks by Zapier action and choose the Custom Request action event. Name it Start biz collect Search.
Configure it:
- Method:
POST - URL:
https://bizcollect.dev/api/v1/search - Data Pass-Through: off
- Data: the JSON body
- Headers: authorization and content type
Set the headers:
Authorization: Bearer YOUR_BIZCOLLECT_API_KEY
Content-Type: application/json
Set the data (mapping trigger fields where you have them):
{
  "location": "{{location}}",
  "keywords": ["{{keyword_one}}", "{{keyword_two}}"],
  "radius_km": 20,
  "scrape_emails": true
}
Use the Custom Request event rather than POST so you control the raw JSON body and headers exactly. If your trigger gives keywords as a single comma-separated string, run it through a Formatter "Split Text" step first and rebuild the array, because the API expects clear keyword input.
After this step, you have a job_id and status. If it fails, check the API key, the body, and current limits in pricing.
Step 3: Delay Before Polling
Add a Delay by Zapier step, Delay For, after the search action. Name it Wait Before Polling.
Set a delay long enough that the job is usually finished by the time you poll. Email extraction requires the API to visit business websites, parse pages, and dedupe addresses, so a too-short delay means the single poll catches a job still running. Because a basic Zap polls only once, size this delay generously:
- Small enrichment jobs: 1 to 2 minutes.
- Typical email-extraction searches: 2 to 5 minutes.
- Large, broad searches: 5 minutes or more.
Delay by Zapier can wait minutes, hours, or days, so a multi-minute pause is well within its range. This single generous delay is the simplest, most task-efficient way to work with Zapier's linear model. If you need true multi-attempt polling, see the Code by Zapier alternative below.
Step 4: Poll /api/v1/jobs/:id
Add a second Webhooks by Zapier action, Custom Request again. Name it Poll biz collect Job.
Configure it:
- Method:
GET - URL:
https://bizcollect.dev/api/v1/jobs/{{job_id}}, mapping thejob_idfrom step 2 - Headers: the same authorization header
Header:
Authorization: Bearer YOUR_BIZCOLLECT_API_KEY
The response includes the current job status. The next step branches on it.
Optional: Code by Zapier for real multi-attempt polling
If a single delayed poll is not reliable enough for your search sizes, replace the Delay and the poll webhook with one Code by Zapier step that polls in a short internal loop. This keeps everything in one Zap run and uses one task instead of several:
// Code by Zapier (JavaScript). inputData.job_id and inputData.api_key are mapped in.
const base = "https://bizcollect.dev/api/v1/jobs/";
const headers = { Authorization: `Bearer ${inputData.api_key}` };

let data = null;
for (let attempt = 0; attempt < 12; attempt++) {
  const res = await fetch(base + inputData.job_id, { headers });
  data = await res.json();
  if (data.status === "completed" || data.status === "failed") break;
  await new Promise((r) => setTimeout(r, 10000)); // wait 10s between polls
}

output = { status: data.status, businesses: data.businesses || [] };
Keep the loop bounded (here, 12 attempts at 10 seconds is about two minutes) so the step never hangs. Code by Zapier has its own execution time limit, so for very large jobs prefer the generous single-delay pattern or run the workflow in n8n or Make, which loop natively.
Step 5: Filter for Completed Jobs
Add a Filter by Zapier step. Only continue when:
status (Text) Exactly matches: completed
This stops the Zap cleanly when a poll catches a job that is still queued or running, or when it failed. For production, add a separate Path or a notification for the failed case so a person knows when a job did not complete, rather than the Zap silently stopping.
Step 6: Split and Clean the Businesses
The completed response contains an array of businesses. Zapier handles arrays through a line-item or Looping by Zapier approach, or you flatten the data in a Code or Formatter step.
The most reliable approach for most users is a small Code by Zapier step that returns one output object per business, which makes Zapier create one downstream run per record:
// Code by Zapier (JavaScript). inputData.businesses is mapped from the poll/Code step.
const businesses = JSON.parse(inputData.businesses || "[]");

return businesses.map((b) => ({
  name: b.name || "",
  address: b.address || "",
  phone: b.phone || "",
  website: b.website || "",
  primary_email: Array.isArray(b.emails) && b.emails.length ? b.emails[0] : "",
  all_emails: Array.isArray(b.emails) ? b.emails.join(", ") : "",
  email_count: Array.isArray(b.emails) ? b.emails.length : 0,
}));
Returning an array from Code by Zapier fans out into one run per item for the steps that follow, which is exactly what you want before writing rows.
If you prefer no code, use Formatter utilities to pull the first email and join the list, then a Looping step over the businesses. Either way, add a Filter after the split where primary_email is not empty if the campaign is email-only. Keep phone-bearing records when calling is also a channel, since email coverage is always partial.
Step 7: Send Leads to Google Sheets
Google Sheets is the easiest first destination. Add a Google Sheets: Create Spreadsheet Row action after the split.
Recommended columns:
Search Job IDBusiness NameAddressPhoneWebsitePrimary EmailAll EmailsEmail CountCreated At
Map the split-step output fields into those columns. For lightweight dedupe, use the website domain or primary email as the unique value; since "Create Row" only appends, add a "Lookup Spreadsheet Row" check before writing if strict uniqueness matters.
Step 8: Send Qualified Leads to HubSpot
For HubSpot, the common flow uses HubSpot's search-and-create actions:
- Find a company by domain or website.
- Create the company if none exists.
- If
primary_emailexists, find a contact by email. - Create the contact if none exists.
- Associate the contact with the company.
Keep the first version conservative. Do not create duplicate contacts because a business has several emails; start with primary_email and store the full list in a custom property or note. A useful company mapping:
Name    -> Business Name
Domain  -> the website with https:// and www. stripped (use Formatter)
Phone   -> Phone
Website -> Website
Add validation before the create actions: only create contacts when primary_email is present, only create companies when website or phone exists, and add a source field such as biz collect Zapier plus the search location and keywords as campaign context. That makes reporting on which searches produced leads straightforward.
Recommended Zap Layout
Here is the complete step sequence for a practical version:
Trigger (Schedule / Form / Catch Hook)
  -> Webhooks (Custom Request POST): Start biz collect Search
  -> Delay For: Wait Before Polling        (or Code by Zapier: poll loop)
  -> Webhooks (Custom Request GET): Poll biz collect Job
  -> Filter: status is completed
  -> Code by Zapier: split + clean businesses   (fans out per record)
  -> Filter: primary_email is not empty (email-only campaigns)
  -> Google Sheets / HubSpot
This design respects Zapier's linear model: one generous delay (or one bounded Code poll loop) instead of an open-ended loop, a filter to stop on incomplete jobs, and a fan-out split before writing. If your jobs are large or you want native multi-attempt polling, the Make.com lead generation workflow and the n8n lead generation workflow handle loops more naturally, and the guide to the best local business lead generation tools in 2026 shows where each fits.
Start Building
The simplest useful Zapier lead generation workflow is only a few steps: trigger, Webhooks POST, Delay, Webhooks GET, Filter, split, and output. The value comes from using an API that returns structured business data and verified website emails instead of asking Zapier to drive a scraper it was never designed to run.
biz collect is built for this exact pattern: one POST to start a local search, async polling for completion, stable JSON fields, OpenAPI 3.1 docs, and deduped contact emails extracted from business websites. It fits Zapier, Make, n8n, scripts, LLM tools, and CRM enrichment.
You can start free with 200 signup credits and no credit card. Open the API docs, review the integrations, check pricing, and build your first automated local leads Zap today.
Frequently asked questions
- How do I build a lead generation workflow in Zapier?
- Use Webhooks by Zapier (Custom Request POST) to send a city and keywords to /v1/search, a Delay by Zapier step to wait, a second Webhooks GET to poll /v1/jobs/:id, a Filter on status equals completed, then a split step and a Google Sheets or HubSpot action to write the leads.
- Can Zapier poll an async API repeatedly?
- Not natively in one run. A single Zap run is linear with no loop-until step, so the simplest pattern is one generous Delay sized to how long jobs take, then a single poll. For real multi-attempt polling, use a Code by Zapier step that fetches in a short bounded loop, or run the workflow in n8n or Make, which loop natively.
- How long should the Delay be before polling biz collect?
- Size it to the job. Small enrichment jobs finish in 1 to 2 minutes; typical email-extraction searches in 2 to 5 minutes; large broad searches can take longer. Because a basic Zap polls once, err toward a longer delay so the poll catches a completed job.
- How do I split the businesses array into separate rows in Zapier?
- Return an array of objects from a Code by Zapier step, which fans out into one run per business for the steps that follow, or use a Looping by Zapier step over the array. Then map the per-business fields into your Google Sheets or CRM action.
- Does this work with Make or n8n too?
- Yes. The API uses standard HTTP requests, so the same search-poll-write pattern works in Make and n8n. Those tools loop more naturally than Zapier, so multi-attempt polling is simpler there, while Zapier shines for its huge app catalog.
- Is there a free tier to test the Zap?
- Yes. You get 200 signup credits plus 20 login credits each day with no credit card, which is enough to build and validate the full Zap before putting it on a schedule.